I had never even seen a ceramic cooker in the flesh, let alone cooked on one, until I moved into our house in Nottingham 3 years ago.
I was aghast when I saw it. Disappointed, apprehensive and tbh, wondering whether I should fork out to replace the cooker in the name of the holy roti.
I tried it for the first few weeks, and was, unsurprisingly, not happy. As a family who eats roti very regularly, we stuck to parathas for a while. Delicious, yes – but a compromise. But then my frustration lead me to research how I could get my electric cooker to work for us.
The problem with cooking roti on an electric/ceramic cooker
A pretty integral part to a well-made roti is charring it over an open flame. It’s not for the visuals (although it does give roti its characteristic dark spots) – sitting it over the flame helps the roti puff up, which essentially cooks it from the inside and gives the roti a double layer. Without the puff, your roti will…
- feel stiff, hard or dry
- not quite get the kind of colouring and dark spots you’d get from a gas stove, which can make it look undercooked. And as they say, we do eat with our eyes…
- not puff up much, if at all, which makes the roti feels doughy and flat.
So, can you make soft roti on an electric or ceramic cooker?
I’m here to tell you, YES. You CAN cook good roti on an electric or ceramic cooker. Hurrah 🥳🙌🏼
I’ve been using a ceramic cooker for almost 3 years now, and I make roti several times a week. My rotis are soft, pliable and cook beautifully ❤️
Initially, it wasn’t straightforward. My rotis felt stiff, undercooked, and flat because they weren’t getting a chance to puff up properly on the tava (pan). But then I realised, I just needed the right tools to help the puffing process.
Or in this case, simply the right TOOL.
What you need
First and foremost, let me introduce you to the ESSENTIAL game changing tool you need for puffy, beautiful rotis:
What you want to get is:
Either a cooling rack with some sort of legs under it, like this:

A metal trivet with feet, like this:

Or a roasting net, which is also called a chapatti grill:

And aside from this, you’ll need a good tava, and some well-kneaded roti dough. I have a video about how to knead the perfect roti dough here.
Method [step-by-step pictures]
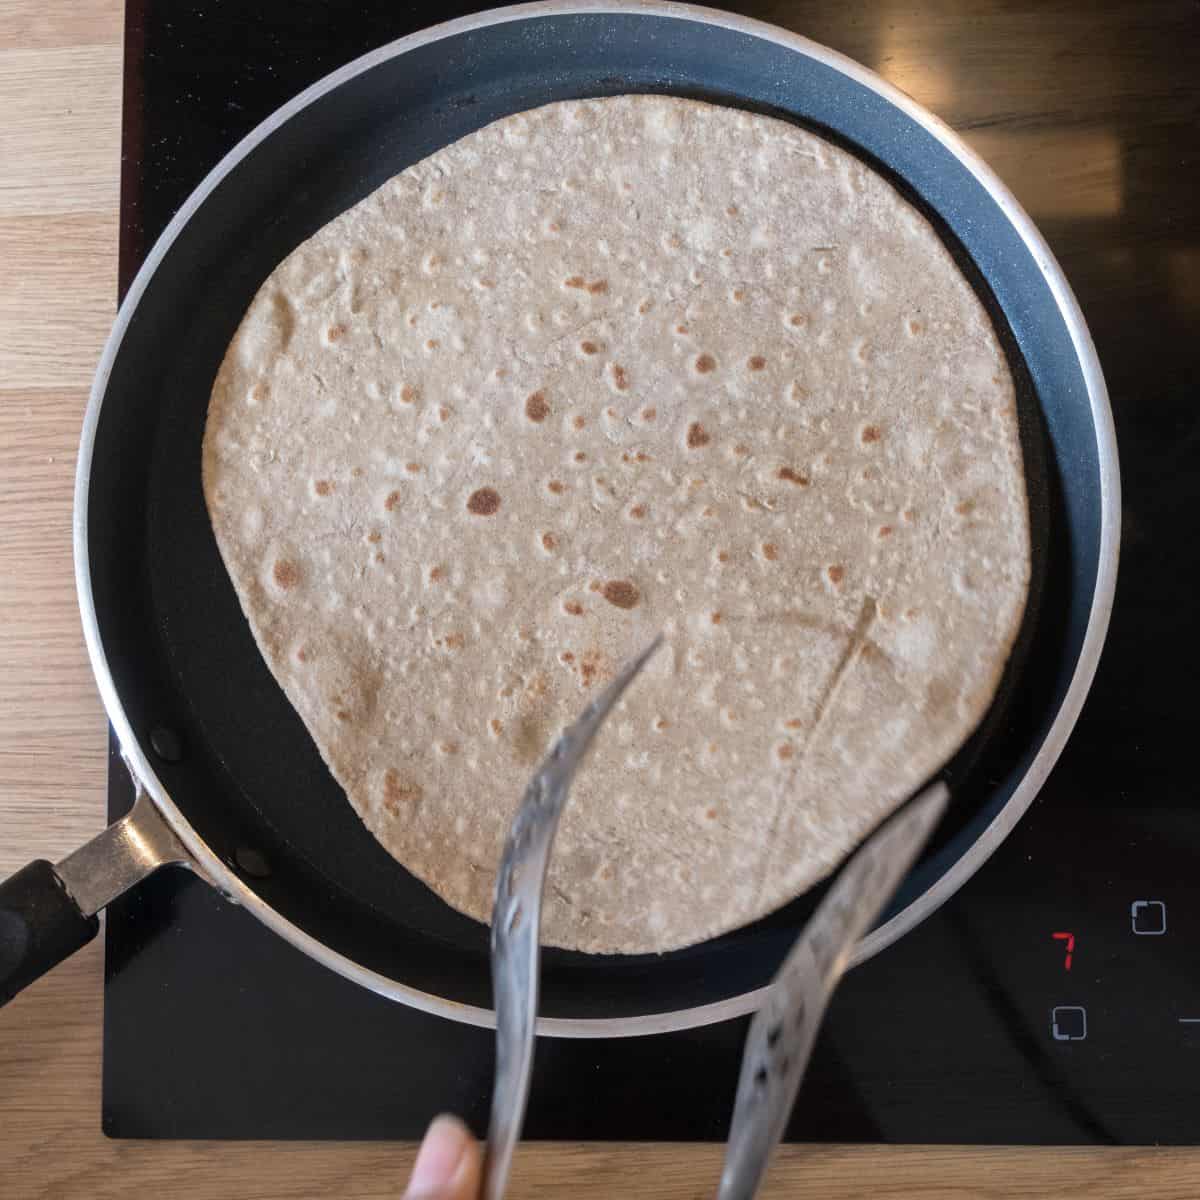
We’ll start our roti off as usual – place your rolled out roti over a pre-heated tava and cook it on one side until you start to see some bubbles appear on the surface of the roti – about 2 minutes.
Once you see those bubbles, flip the roti over and cook the other side, till you see some more bubbles appear – about 1 – 1 ½.
Keep an eye on the roti and go for when the bubbles appear, whether that takes less time or more time than I’ve stated.
TOP TIP: to prevent the roti becoming overly dry or stiff, avoid overcooking the roti during this stage. It will take on some colour and spots, but it shouldn’t take on too much.


On another burner, have your cooling rack/trivet/roasting net ready.
Take the roti and place it over the rack/trivet/net. Slowly, your roti should begin to puff up! 😍
You can nudge the roti around as you would over a gas stove, to ensure the roti colours evenly.


Flip the roti over and do the same for the other side.
To repeat the tip shared above, don’t overcook the roti as it’ll lead to dry roti.


And you’re done! You’ve just made yourself a beautifully puffed, soft roti without the need of a gas stove! *chefs kiss*
How do you make roti on an induction cooker?
Induction cookers are a different ball game for roti. The heat doesn’t transfer unless there’s an induction-friendly pan placed onto the stove – this means any kind of rack or net placed onto the burner won’t get any heat.
I’m afraid I don’t have any experience with cooking on an induction cooker, and I can’t think of a method that would warrant any advice from me. If you do have any tips or experience, please feel free to share them in the comments below for anyone who may be reading and struggling!
Save for later ⬇️⬇️


Leave a Reply